
In my last blog, I wrote about three considerations for your Azure Information Protection deployments and commented on often overlooked potential downsides, or at least areas with which to be cautious. In hindsight, it all feels a bit negative. I am, for the record, an advocate of Microsoft 365 customers using AIP (sensitivity labels) in basically any circumstance it’s appropriate to do so. So in this blog, I’ll counter the earlier post with three often overlooked useful things you can do with it.
My great friend Peter and I run a show called Cloud Conversations, which you can catch on YouTube and podcast apps like Spotify or through Anchor. We chat with a lot of MVPs and other experts on areas such as Azure, Microsoft 365, and IT careers in general. Watching shows back as a host, you start to notice your own linguistic habits, and shake your head in despair. One I have, and can’t seem to break, is the constant use of “cool” to describe just about everything.

As IT pros, we know not to start using the tech just because it’s cool, but because it contributes to an organisational goal. Although these are all things I think are fun (and cool) to implement, I’ll also back up their introduction to your Azure Information Protection deployment with the appropriate scenarios for their use.
1. Conditional Access for Labelled Documents
Azure AD Conditional Access (CA) is the backbone of much of Microsoft 365’s zero-trust security philosophy. I’ll spare the background of Conditional Access, which I’ve covered mostly over at Petri.com, but remind you that with CA, you have policies that apply “if this, then that” rules to accessing Azure AD authenticated applications.
Azure Information Protection is available as a selectable cloud app within CA policies, which means you can enforce grant controls on various conditions.
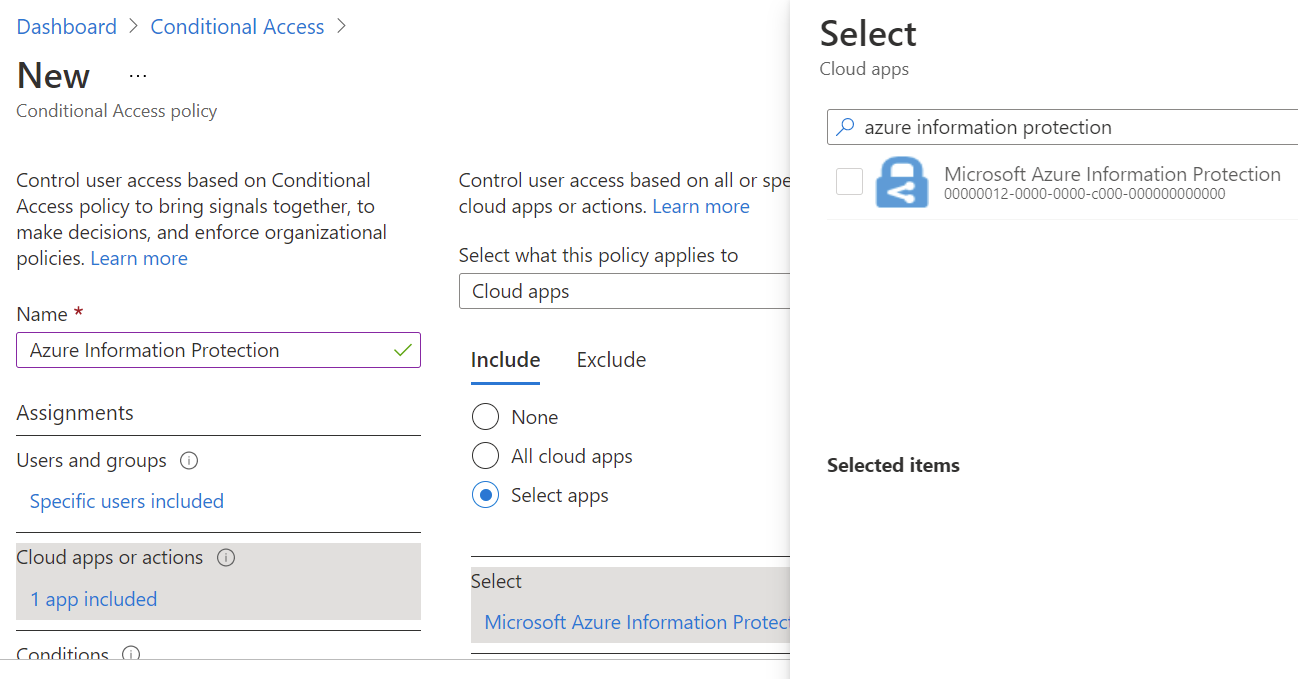
When a user opens a file with a sensitivity label, they (the client) connect to the Azure Rights Management (RMS) cloud service. The client’s Azure AD account is used to confirm their rights to the file (if any). It’s at the point of connecting to the service that the Conditional Access policy works; as if the user were connecting to any other Azure AD app.
The headline use of Conditional Access + Azure Information Protection is multi-factor authentication, the most common use case for Conditional Access in general. What’s important to know about MFA is that if the user has already satisfied authentication requirements for the Office app, even from Windows SSO, they won’t get the MFA prompt. For that same reason, this does not apply to files accessed in SharePoint Online/OneDrive for Business and access via the web apps if you navigate there after already authenticating.
MFA aside, we can really use any of CA’s grant controls, including only allowing access on managed devices, limiting access to known IPs, or prohibiting access if there is Identity Protection risk associated.
2. Label and Protect Files on Download
Continuing the trend of Conditional Access, one of the things you can do with it is reverse proxy traffic through Microsoft Cloud App Security (MCAS) using what it calls session policies. For apps and users in scope, traffic is routed to the user as a subdomain of mcas.ms, which gives the administrator, rather than only the app, the means to control (and monitor) activities in web app sessions.

A use case for this is usually unmanaged device access. Let’s say you want to allow users to download and work on corporate files on PCs you don’t control, but you still keep those files safe. With a session policy, when users download Office format files or PDF files (up to 50MB), a label can be applied; and not just to Office 365 content - this can apply to other SaaS applications you have integrated with MCAS, including services such as Google Workspace. For files that you can’t protect - for example, an unsupported format, size, or service - you can block those downloads altogether.
The actual benefit for that unmanaged device access then comes when the user no longer should access the file. If their account is disabled or they are otherwise removed from the label’s access rights, they cannot access the file (assuming you have configured the label appropriately; such as not allowing infinite offline access).
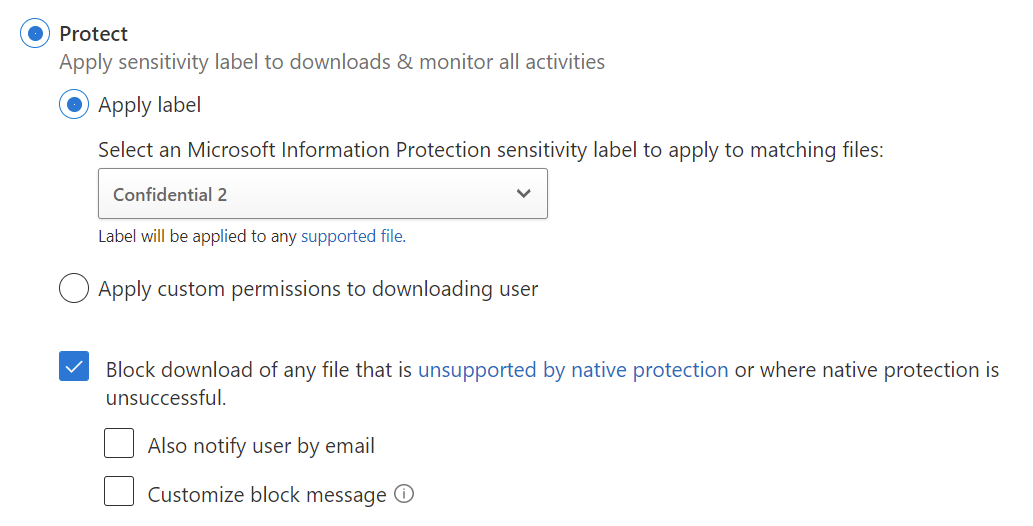
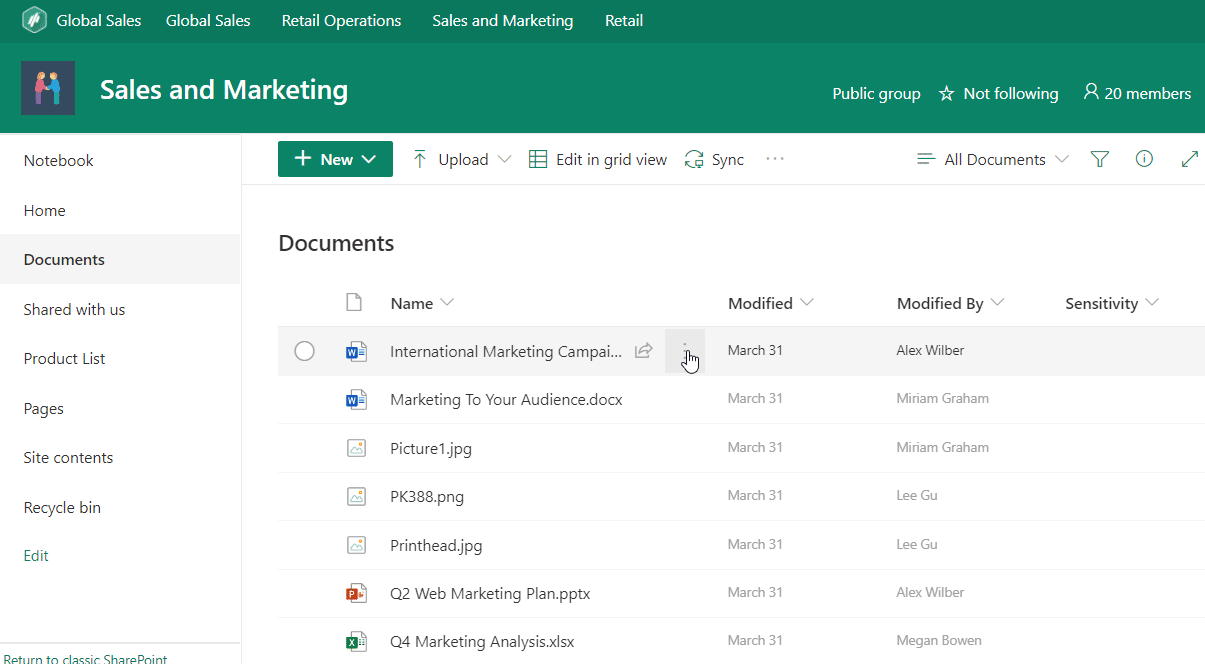
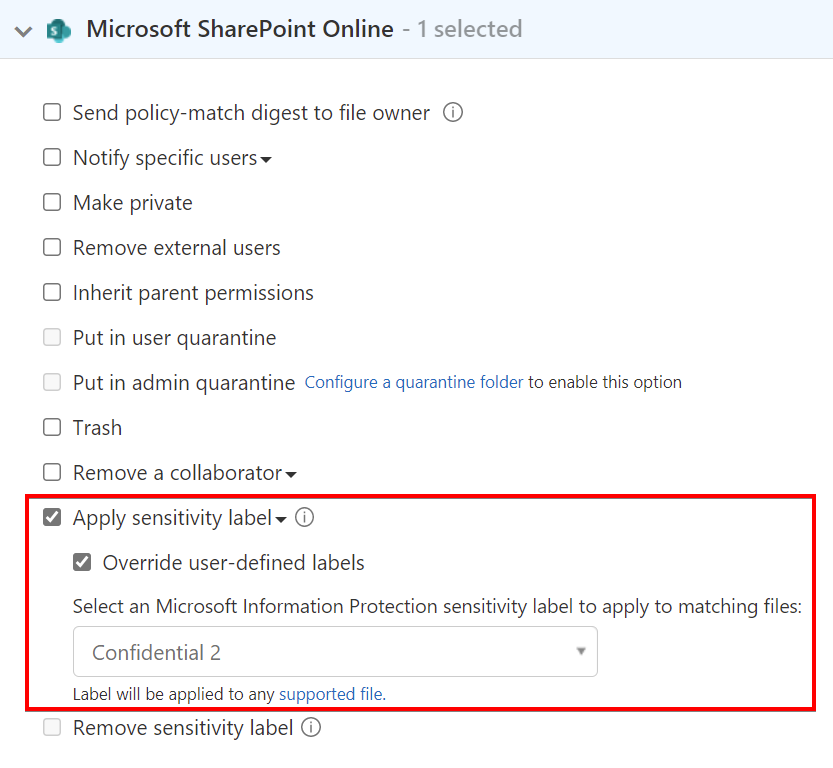
In the session policies, you can either apply a predefined label (such as “Confidential”) or instead set custom permissions: viewer, reviewer, co-author, or co-owner. Following the animation below, you can see there is no sensitivity label on the file hosted in SharePoint Online (check the empty ‘sensitivity’ column), but when opening it locally after download, it has a Confidential label.
If you want to get really fine-grained about what you protect, you can use the session policy’s inspection capabilities. This leverages the data classification service or built-in DLP functionality to label only files that meet certain criteria. For example, only protect files that include a trainable classifier match (source code, resume, etc); sensitive info type (identifiable info, financial information); or exact data match (records from an external system, such as CRM data).
3. Auto Label Files by File Attribute or Location
At the risk of this blog turning into “cool things to do with Microsoft Cloud App Security”, we turn to MCAS again for this tip on utilising Azure Information Protection.
When Microsoft first revealed sensitivity labels for containers, the assumption was it would automatically label any files added to those containers with that same label. If you uploaded a file to a “Confidential” Team or SharePoint site, it would inherit that label. Not so fast. Container labels operate entirely differently and only apply settings to the container itself, such as external sharing settings and privacy, rather than its contents.
When it comes to auto labelling files by container, we can sort of use MCAS’s file policy options. While we can’t select a whole Team or site, we can select folders for which we’ll automatic apply file labels. Just like session policies, labels can be applied broadly or you can use content inspection services based on the data that’s actually in the file. I’ll skip past that for now and focus on protecting all files in a folder. We can do actually do this not just for SharePoint and OneDrive, but also Dropbox and Box if they have been integrated with MCAS using app connectors.
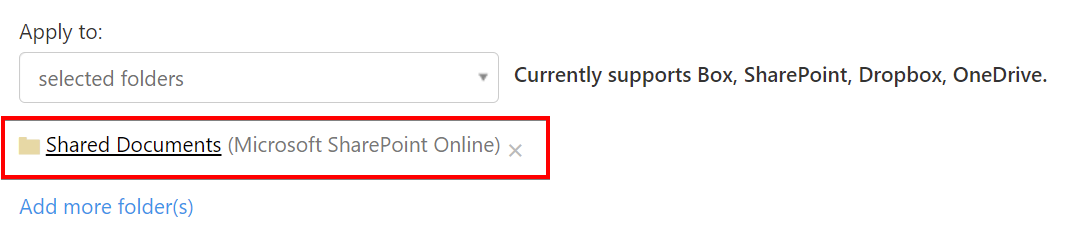
I say we can sort of do this because it’s a bit limited. For starters, there’s a 50 count limit on file policies, a 100 label per tenant per day limit, and you also have to manually select the folders, you can’t have dynamic rules such as “folder name contains X”. To me, this feature has its place but still has a long way to go. As a general warning about MCAS-protected files, these cannot be opened in the web apps if hosted in SharePoint Online and OneDrive for Business, as covered here.
However, file policies apply to more than just location, so consider the other users. For example, label all files where user X is the owner; are shared with user X or domain X. Really, any kind of file filter MCAS supports.
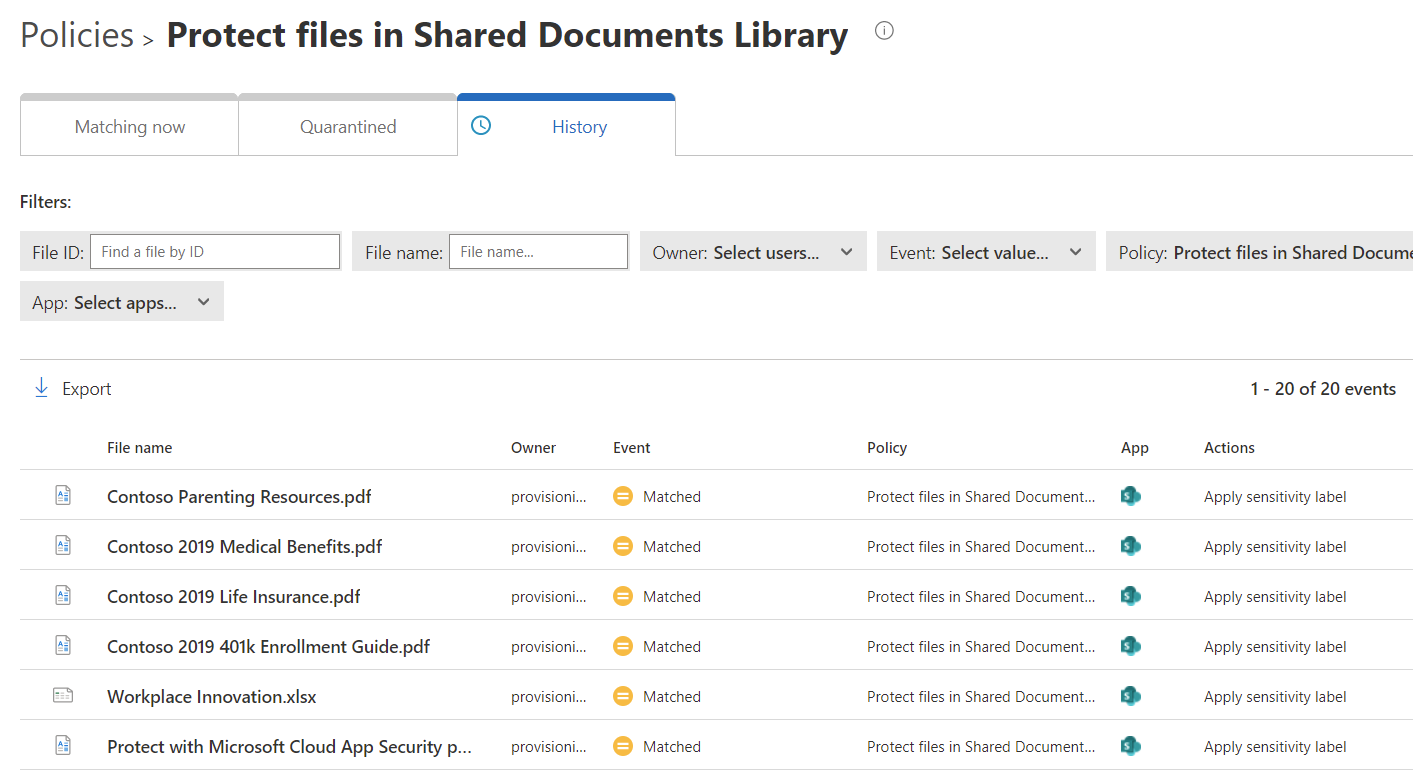
Regardless of what criteria you choose for auto-labelling with MCAS, you’ll find the files it matches against your policy by going into the policy itself, then you can view the history of actions (applying labels) to confirm your scope is as expected.
Microsoft Information Protection with AIP P2 licensing has a native ability to auto-protect content in ODfB and SPO with automatic labelling policies, created in the Compliance Centre, or on-prem using the AIP Scanner. But if you need to protect content in third-party SaaS, start looking at MCAS.