Getting your devices into Defender for Endpoint is referred to as onboarding and can be done in lots of different ways, depending on the scenario. The tools you use for Windows Server 2008 R2, for example, are different from the tools you use for Windows Server 2019, which are different from the tools you use for Windows 10, and so on.
The common denominator behind most onboarding methods is internet connectivity. Your device connects directly to the cloud service and provides all that telemetry goodness via a direct line of sight.
What about Windows devices that only have LAN access? That is, they can connect with your on-premises infrastructure and are probably Active Directory domain-joined, but you have restricted their ability to connect to the public internet. This is commonly seen in scenarios where you are using PCs more like appliances. They have one function (security camera footage, machine operations), and that’s it. You have restricted internet access as part of a layered approach to reducing attack surfaces.
There are two elements of Defender we need to consider: Microsoft Defender Antivirus and Microsoft Defender for Endpoint(MDE).
- Defender Antivirus is the core engine on the client that does the malware scanning and provides functionality such as Network Protection. It is built into Windows 10. This blog will focus only on Windows 10, but it’s worth knowing that Defender Antivirus has many different names and features depending on the operating system, and in some cases is not pre-installed.
- Defender for Endpoint is the EDR/XDR solution that reports telemetry and device information to the administrator in a central management pane for protection against often malware-free attacks. Some elements of MDE require Defender Antivirus, such as cloud-delivered protection.
So, we know the two parts that need to be tackled. How can we do each for Windows 10 no-internet devices?
- Defender Antivirus can be configured using Group Policy, or even the GUI on the device itself.
- Defender for Endpoint can be configured to point to a proxy application/device using Group Policy, or registry edits on the device.
In this blog, I’ll guide you through the latter; including how to set up a proxy on a Windows Server using Squid.
Set up Squid proxy
Squid is free software (GNU General Public Licence v2) that we can install on a Windows Server to make that server a proxy server.
Download Squid for Windows here.
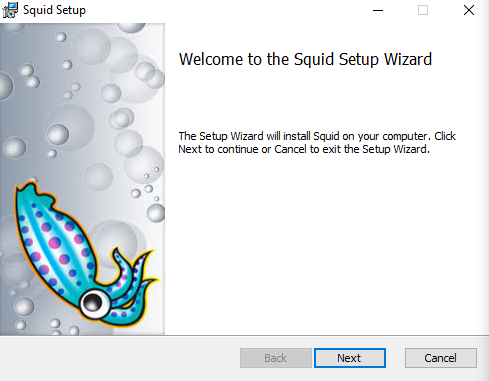
Install Squid on what will become your proxy server. The default settings are fine.
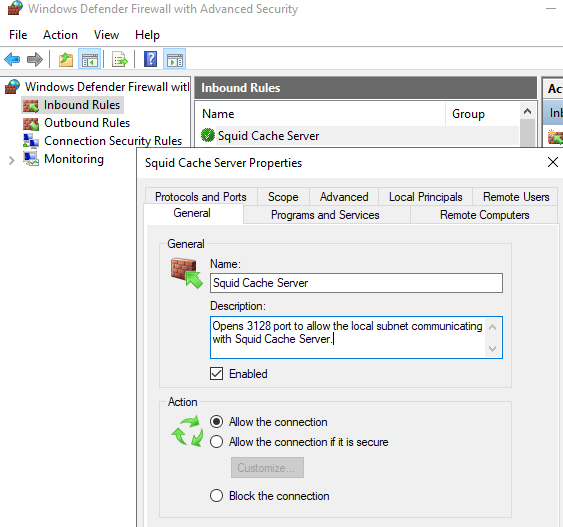
 3. You need to open inbound TCP port 3128 for Squid on your firewall. In Windows Firewall, this is done automatically by the install, and you can confirm it by viewing the rule Squid Cache Server Properties.
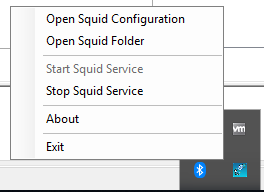
 4. Squid will show as running in the notification area on the server. Choose to Stop Squid Service, then Open Squid Configuration. All configuration in Squid is done by editing the configuration text file.
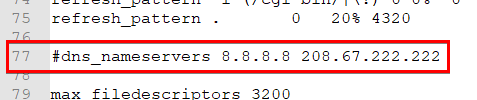
 5. I make two changes to the configuration file. I add an ACL entry for my LAN:

And I comment out the DNS servers, which means it will use the DNS servers the server is set to use instead of the config file.
 6. Save the config file, close it, then from the notification area icon, Start Squid service.
Set up telemetry proxying with Group Policy
Older versions of Windows required an agent to onboard into MDE because they didn’t have Windows 10’s built-in ability to gather the required telemetry. To gather that telemetry, we need to tell devices to transmit it through our proxy server because, by default, Windows 10 tries to do it using a direct internet connection.
Create/update a Group Policy Object scoped to the appropriate OU. The policies we’ll be setting are found in Administrative Templates > Windows Components > Data Collection and Preview Builds.
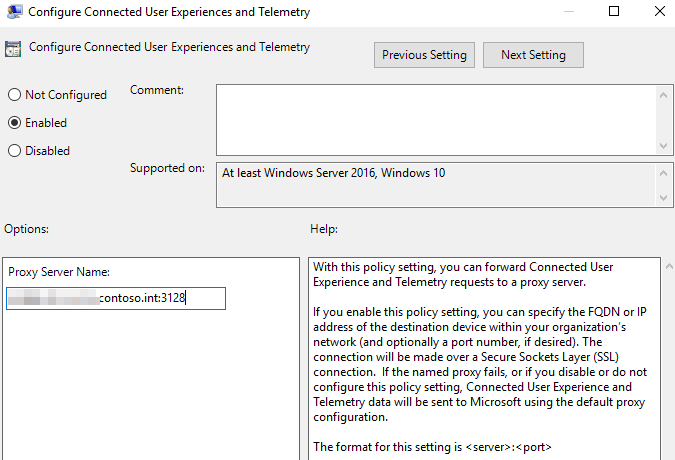
Enable Configure Connected User Experiences and Telemetry with the FQDN of your proxy server and port. E.g. server1.domain.local:3128.
 3. Enable Configure Authenticated Proxy usage for the Connected User Experience and Telemetry Service and set it to Disable Authenticated Proxy usage.
Configure onboarding with Group Policy
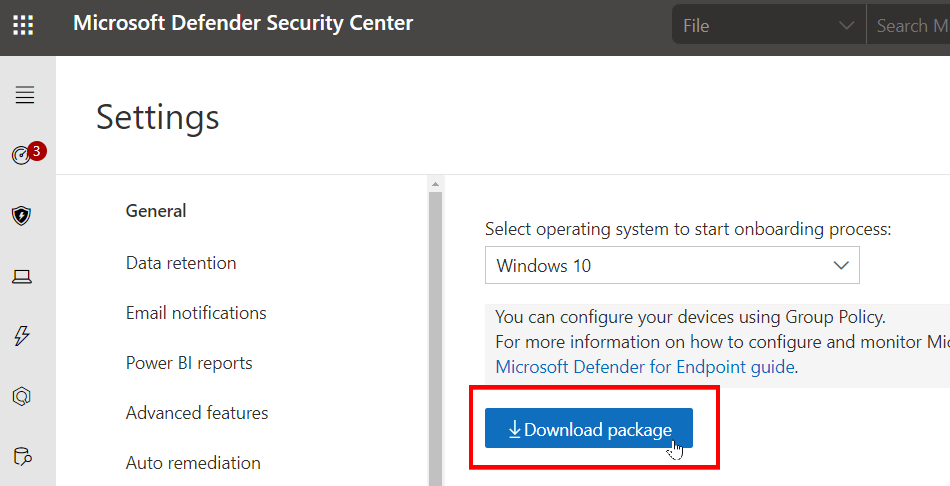
Navigate to Microsoft Defender Security Center > Settings > Onboarding and choose Windows 10 as the OS.
Click Download package to get WindowsDefenderATPOnboardingPackage.zip, which you should extract to a shared location the LAN device can access remotely.
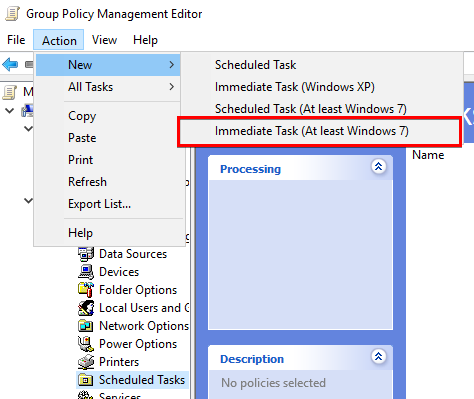
 3. We use this package as a scheduled task on the devices to onboard, so in your Group Policy, navigate to Computer Configuration > Preferences > Control Panel Settings > Scheduled Tasks.
- Choose Action > New > Immediate Task (At least Windows 7).
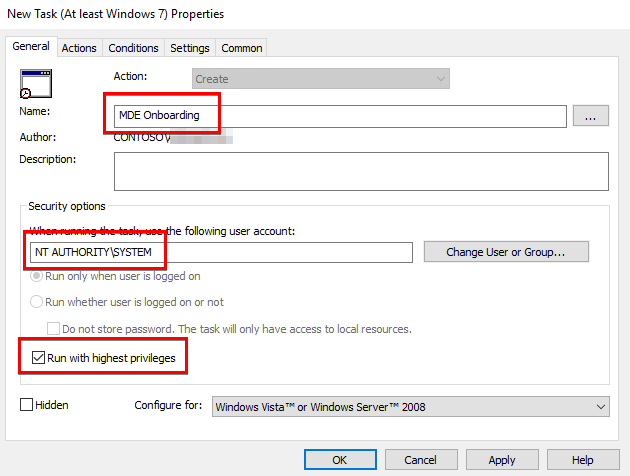
 5. In the General tab, give the task a name, specify NT AUTHORITY\SYSTEM as the account to run as, and tick the box for Run with highest privileges.
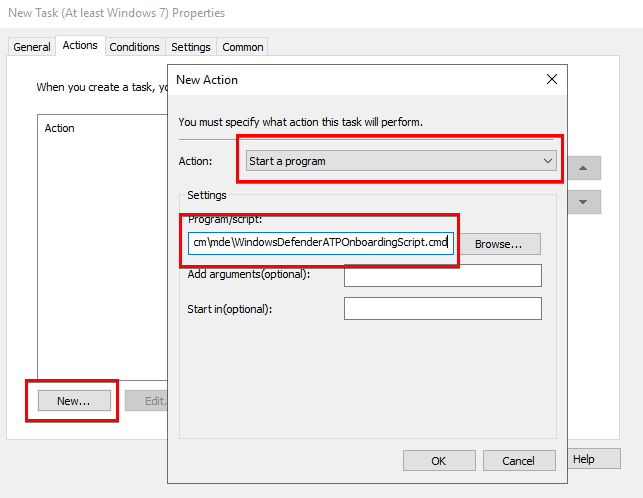
 6. In the Actions tab, create a New… action of type Start a program, where the program/script is the full network-accessible path of the WindowsDefenderATPOnboardingScript.cmd file you downloaded earlier.
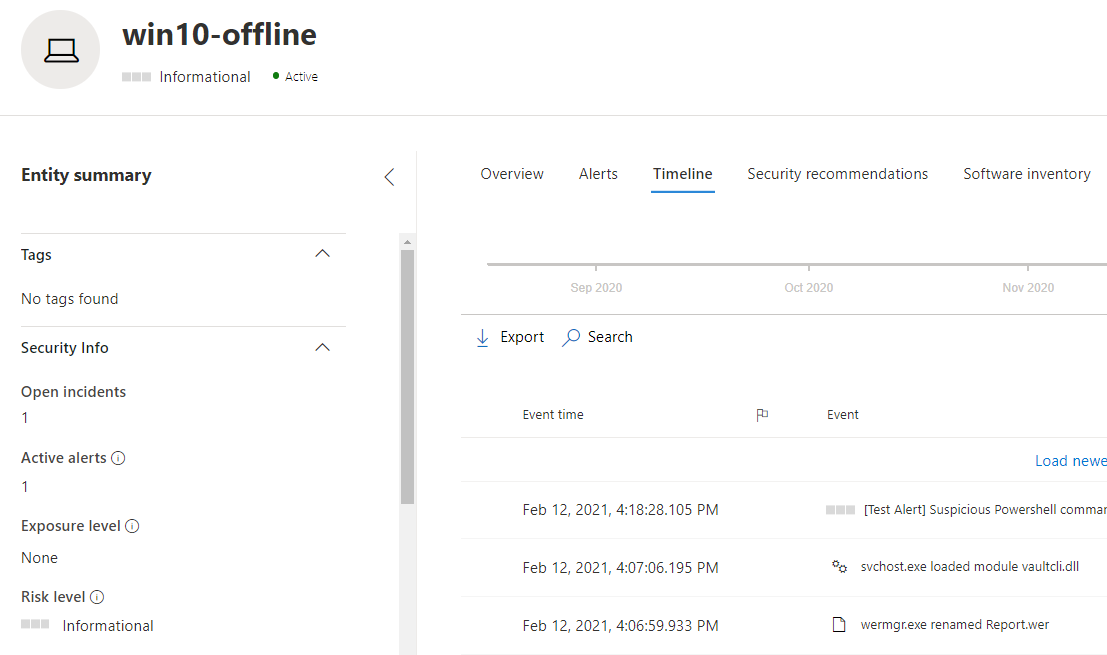
Results
On the client, when group policy now updates, it will apply the configuration and Defender for Endpoint will onboard via your proxy server. The device will show in device inventory in MDE. In a future blog, I will include a writeup on how to configure the Antivirus engine and other elements such as Attack Surface Reduction via Group Policy, which will complete the picture for your LAN-only Windows 10 devices. Note that some features such as Live Response will be unavailable because the proxy only applied to telemetry traffic. We can, however, use that telemetry to get alerts and a timeline:
