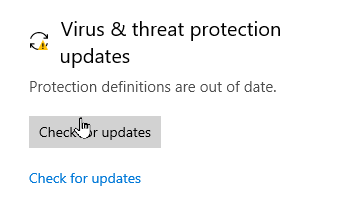
Although not common, there are scenarios out where you will have LAN-only devices onboarded in Microsoft Defender for Endpoint (MDE), or at least using Microsoft Defender Antivirus (MDAV). With no line of sight to the internet, you can use options such as WSUS, but in this blog, I’ll explore using a network share, as WSUS isn’t always an option.
Set up the network share for updates
- Create a directory on your file server with subdirectories for the different CPU architectures you’ll be supporting.
 2. On the server, we’ll be installing a script provided by Microsoft. In PowerShell with elevated rights:
Install-Script -Name SignatureDownloadCustomTask -Force
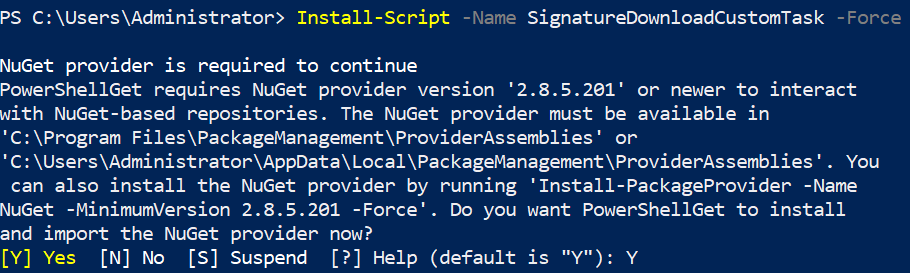 3. Confirm where the script downloaded to as we need to reference the file path when scheduling. Alternatively, you can manually download the script, or move it once you ran Install-Script.
Get-InstalledScript -Name SignatureDownloadCustomTask | FL InstalledLocation
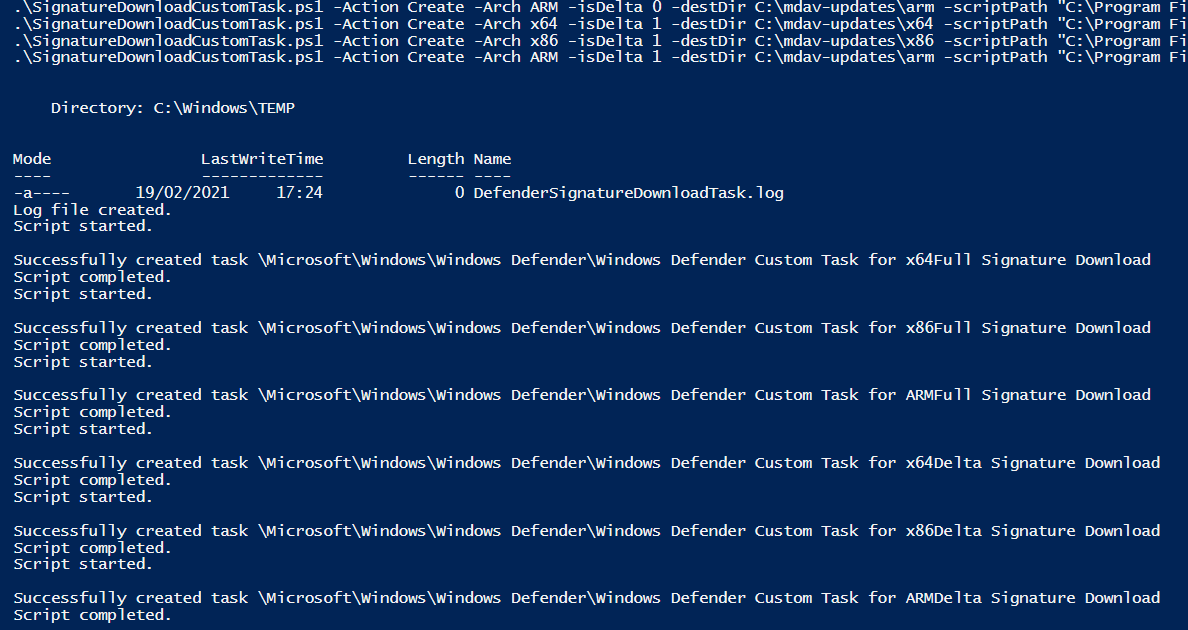
 4. The script will create Task Scheduler entries to automatically download updates that are “published” within our shared folders. Each architecture (x86, x64, and ARM) can get full and delta updates, with a full update required for clients that have not updated for some time; approximately one month.
To create the full and delta updates, update daily, run the following, replacing the destDir and scriptPath values to your own. The latter part of this ensures the PowerShell script has permission to run.
$destDir = "C:\mdav-updates"
$scriptPath = "C:\Program Files\WindowsPowerShell\Scripts\SignatureDownloadCustomTask.ps1"

.\SignatureDownloadCustomTask.ps1 -Action Create -Arch x64 -isDelta 0 -destDir $destDir\x64 -scriptPath $scriptPath -daysInterval 1
.\SignatureDownloadCustomTask.ps1 -Action Create -Arch x86 -isDelta 0 -destDir $destDir\x86 -scriptPath $scriptPath -daysInterval 1
.\SignatureDownloadCustomTask.ps1 -Action Create -Arch ARM -isDelta 0 -destDir $destDir\arm -scriptPath $scriptPath -daysInterval 1
.\SignatureDownloadCustomTask.ps1 -Action Create -Arch x64 -isDelta 1 -destDir $destDir\x64 -scriptPath $scriptPath -daysInterval 1
.\SignatureDownloadCustomTask.ps1 -Action Create -Arch x86 -isDelta 1 -destDir $destDir\x86 -scriptPath $scriptPath -daysInterval 1
.\SignatureDownloadCustomTask.ps1 -Action Create -Arch ARM -isDelta 1 -destDir $destDir\arm -scriptPath $scriptPath -daysInterval 1
- PowerShell will return that several tasks have successfully been created:
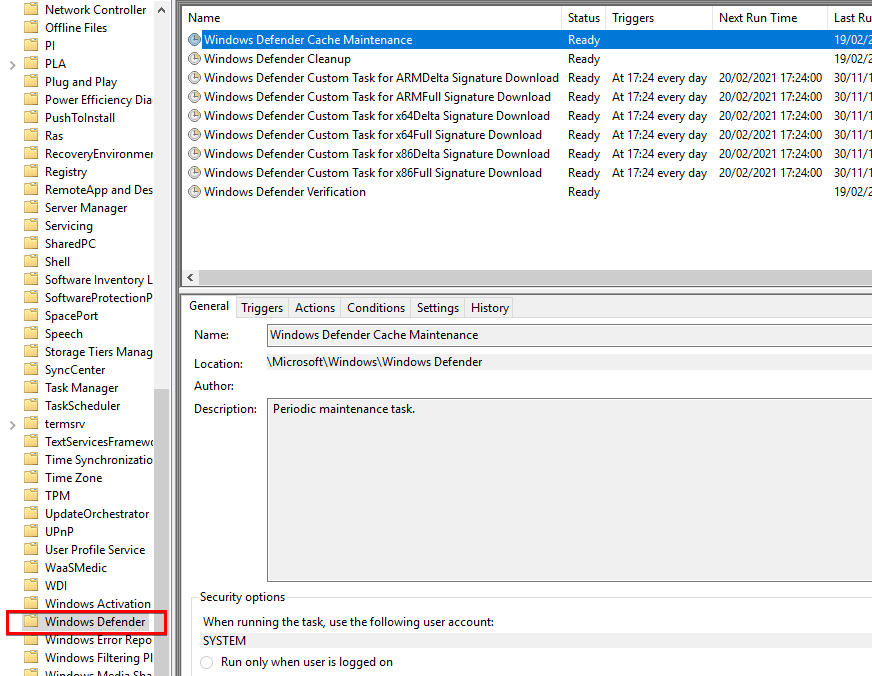
 6. We can confirm this in the Task Scheduler GUI by navigating to Microsoft\Windows\Windows Defender. Note the triggers are daily at the time we executed the PowerShell commands. You can change this if you need to.
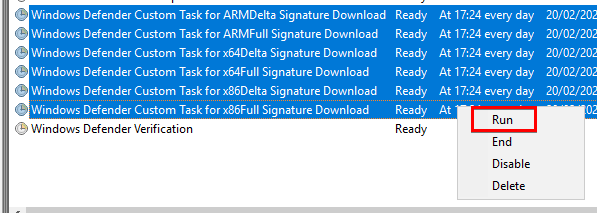
 7. For now, the tasks haven’t run, and the folders we created earlier to house the updates are still empty. So right-click > Run.
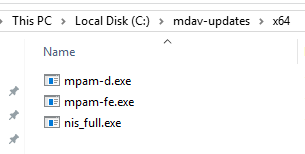
 8. Reviewing the folders, we can see the update files. If the jobs don’t run, it’s probably your execution policy for PowerShell. You could update the Task Scheduler entries to bypass it.
Update Defender Antivirus Update Source
Your updates are good to go, but MDAV has no awareness of them yet. Group Policy is how we’ll get our LAN-only device to point to a shared folder to get them, and this can be done for your domain’s Group Policy or a local Group Policy if you have no domain line of sight or no domain at all; which is likely if you’re doing this instead of WSUS… or maybe you just share my terror of WSUS.
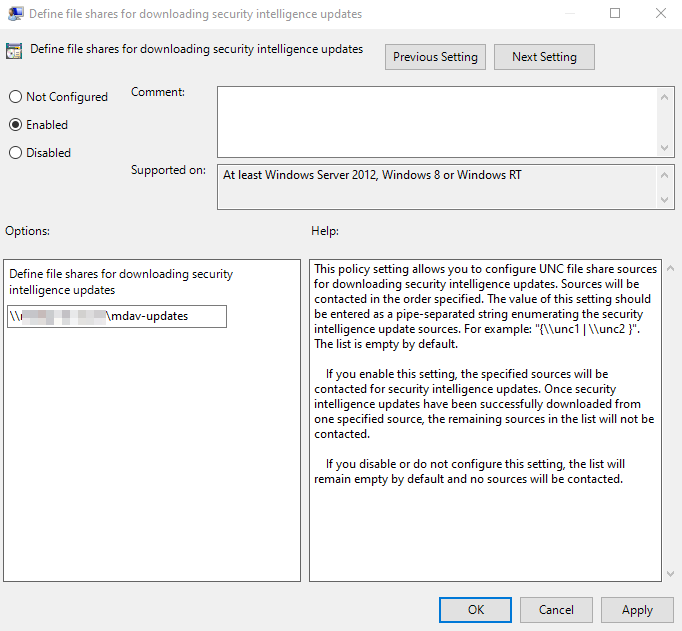
In the Group Policy Edit, navigate to Computer Configuration\ Administrative Templates\ Windows Components\ Microsoft Defender Antivirus\ Security Intelligence Updates.
For the setting Define file shares for download security intelligence updates point to the UNC path minus the architecture subdirectories.
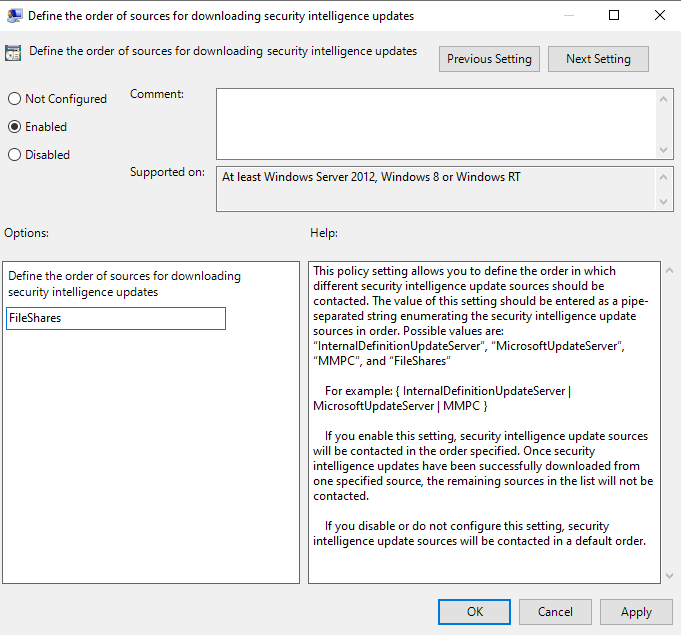
 3. For the setting Define the order of sources for downloading security intelligence updates set the value as FileShares.
 4. The client will now update using the network share.